
How to Connect an MCP Server to Claude
A complete guide to connecting an MCP Server to Claude, enabling secure, real-time data access and context-aware AI responses.
Before jumping into setup, it’s useful to understand what an MCP server is and why connecting one to Claude can significantly expand what the assistant can do.
For ChatGPT instructions, see here.
What Is an MCP Server?
An MCP (Model Context Protocol) server is a standardized interface that allows AI assistants like Claude to securely connect to external tools and data sources.
Instead of relying solely on text you paste into a conversation, MCP enables Claude to:
- Discover available tools and capabilities
- Call them in a structured, predictable way
- Receive machine-readable responses it can reason over
In practice, an MCP server acts as a trusted bridge between Claude and your systems.
What MCP Unlocks for You
Once connected, an MCP server allows Claude to:
- Use real tools, not just text
Query live systems, run searches, and retrieve analytics directly from chat. - Work with live, permissioned data
Access up-to-date information without manual uploads. - Maintain strong security boundaries
OAuth-based permissions ensure only approved access. - Turn conversations into workflows
Replace one-off prompts with repeatable, tool-backed actions.
MCP effectively turns Claude into an interactive interface for your tools and data.
Example: Connecting the PeakMetrics MCP Server to Claude
To make this concrete, let’s walk through connecting the PeakMetrics MCP server to Claude.
Note: You must have a paid Claude plan (such as Claude Pro or Claude Team) to connect external MCP servers. On Team plans, an admin may need to enable or add connectors.
Step 1: Open Claude Settings
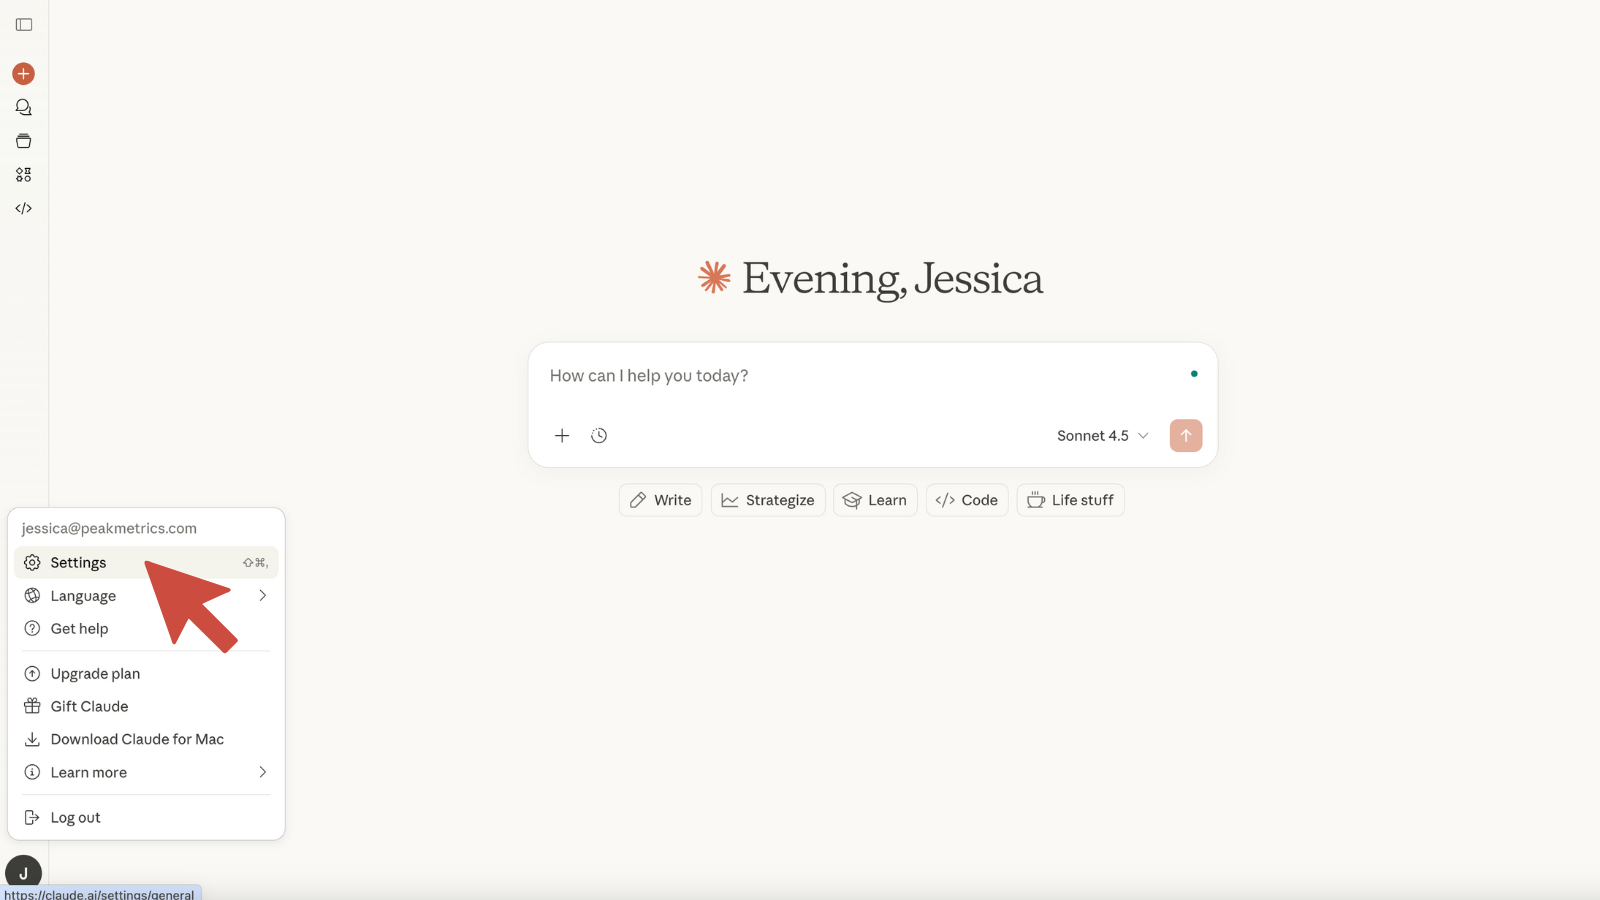
- Go to https://claude.ai and sign in
- Click your profile icon (bottom-left)
- Select Settings

- Navigate to Connectors or Integrations
- On Claude Team plans, this may be managed under Admin settings.
Step 2: Add the PeakMetrics MCP Server
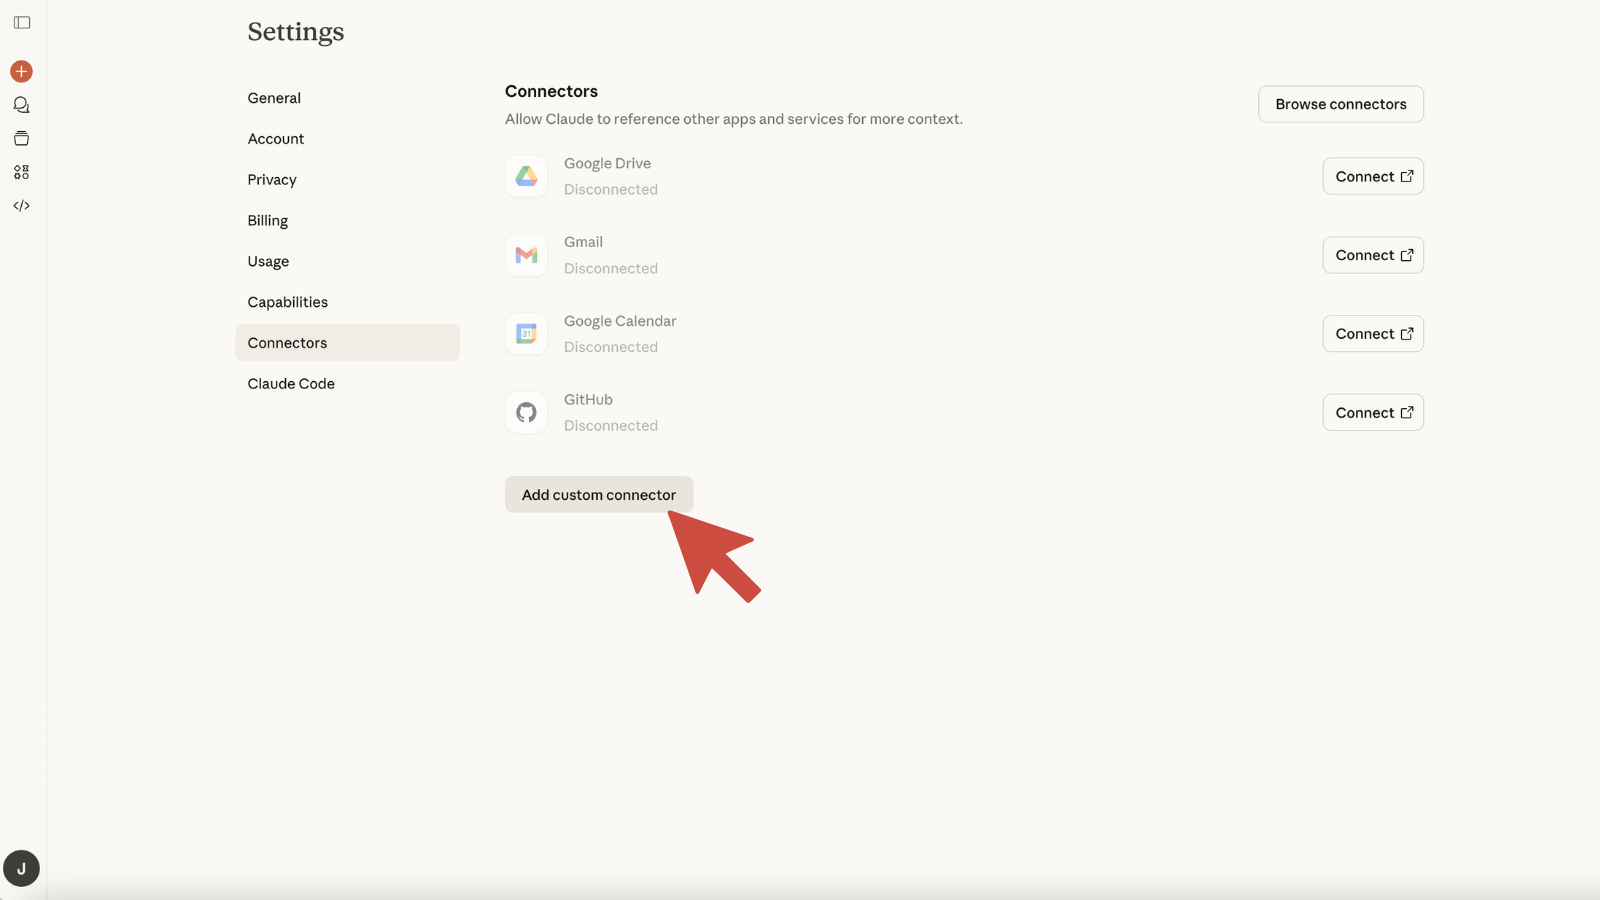
- Click Add custom connector or Add integration
- If prompted, choose the option to add via URL or Remote Server
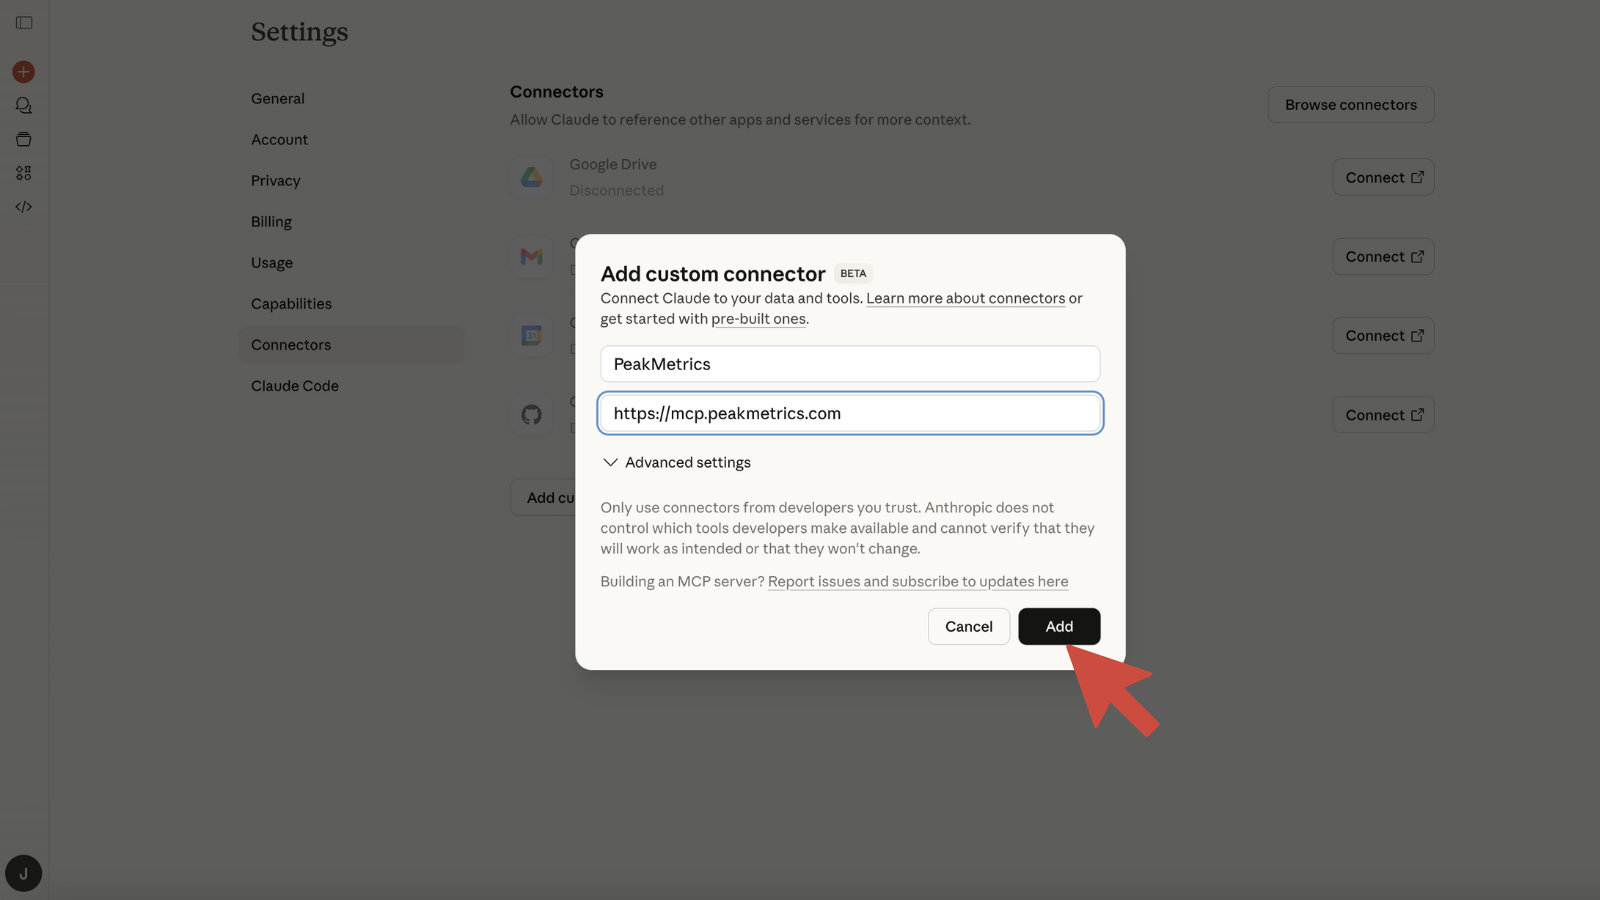
- Enter the following details:
- Server Name: PeakMetrics
- Server URL: https://mcp.peakmetrics.com
- Click Add or Connect
- Claude will validate the MCP server automatically.
Step 3: Connect Your PeakMetrics Account
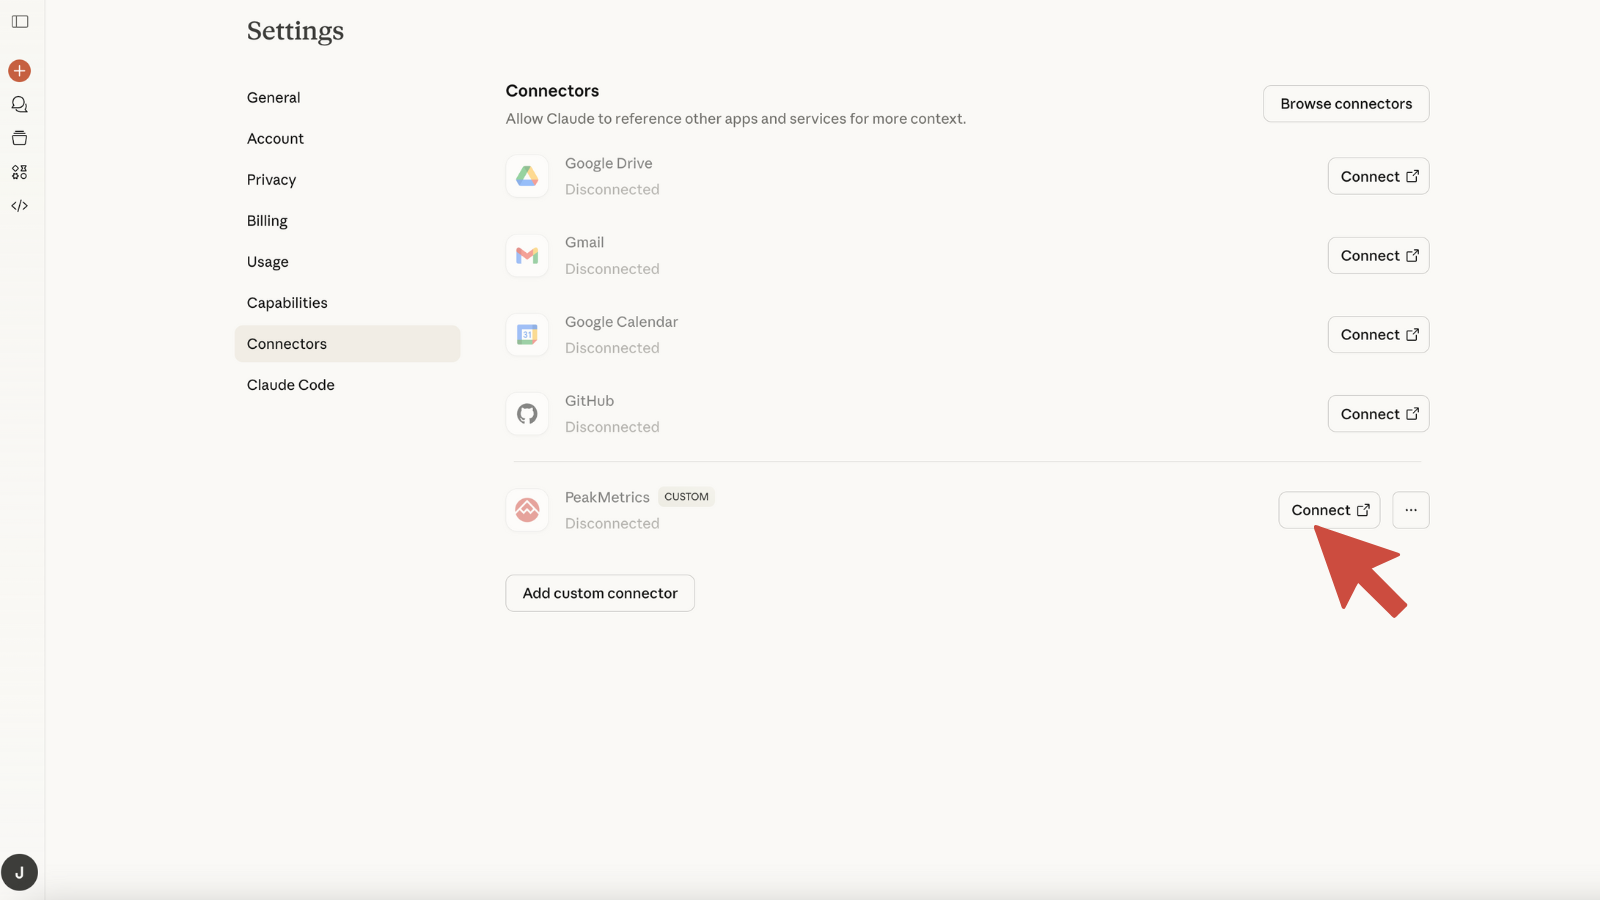
- Click the Connect button for PeakMetrics
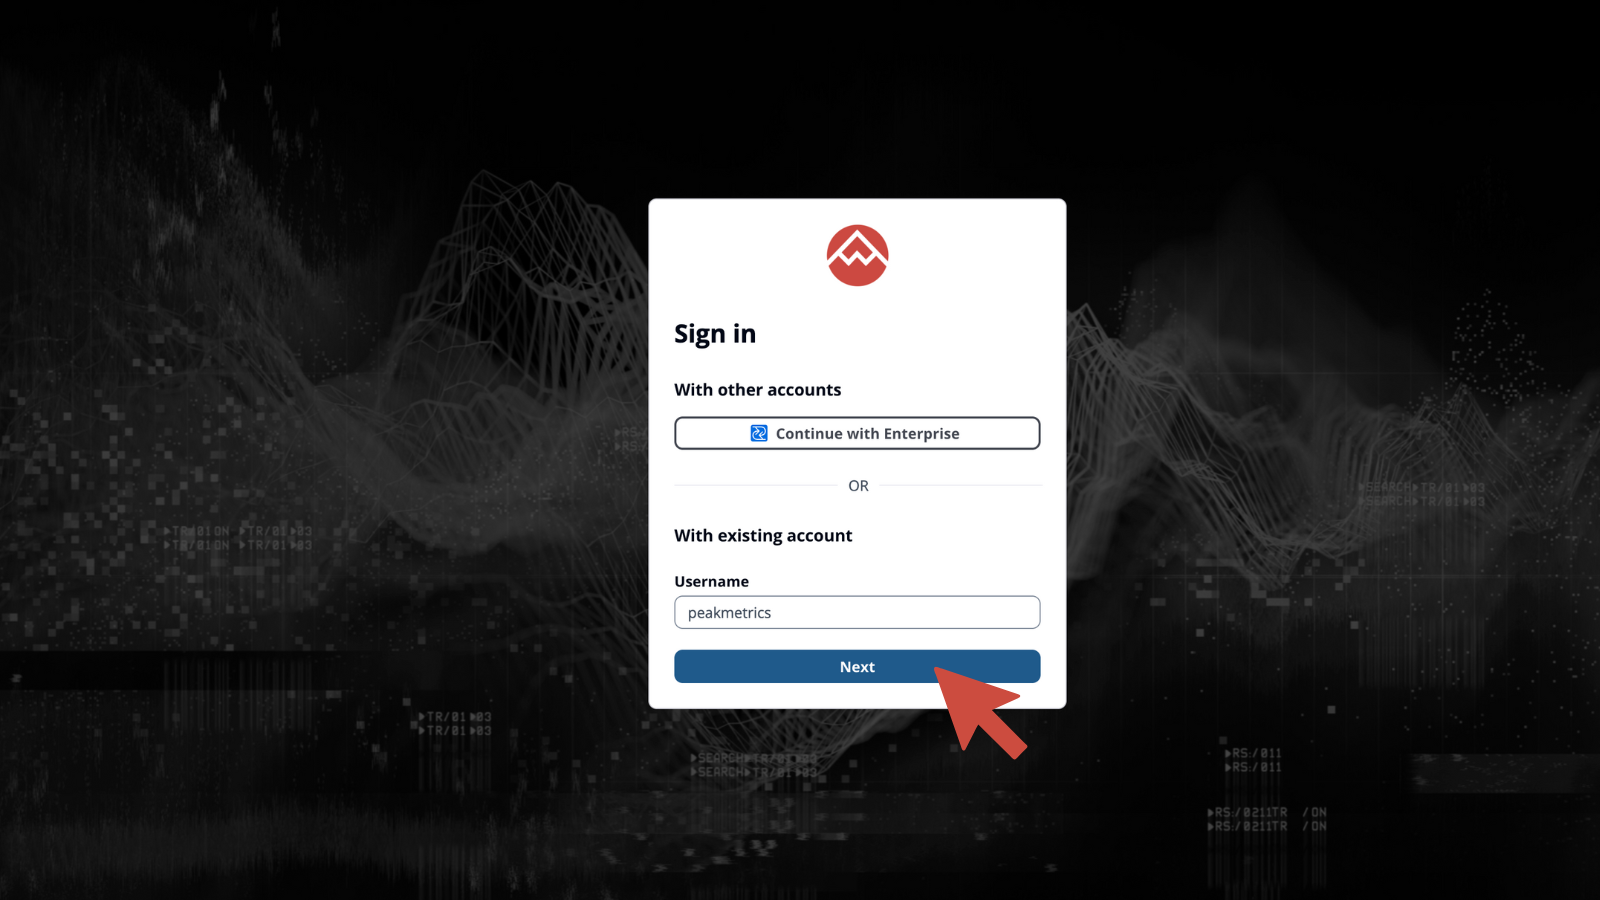
- You’ll be redirected to the PeakMetrics sign-in page
- Log in with your account
- Review and approve the requested permissions
- You’ll be redirected back to Claude
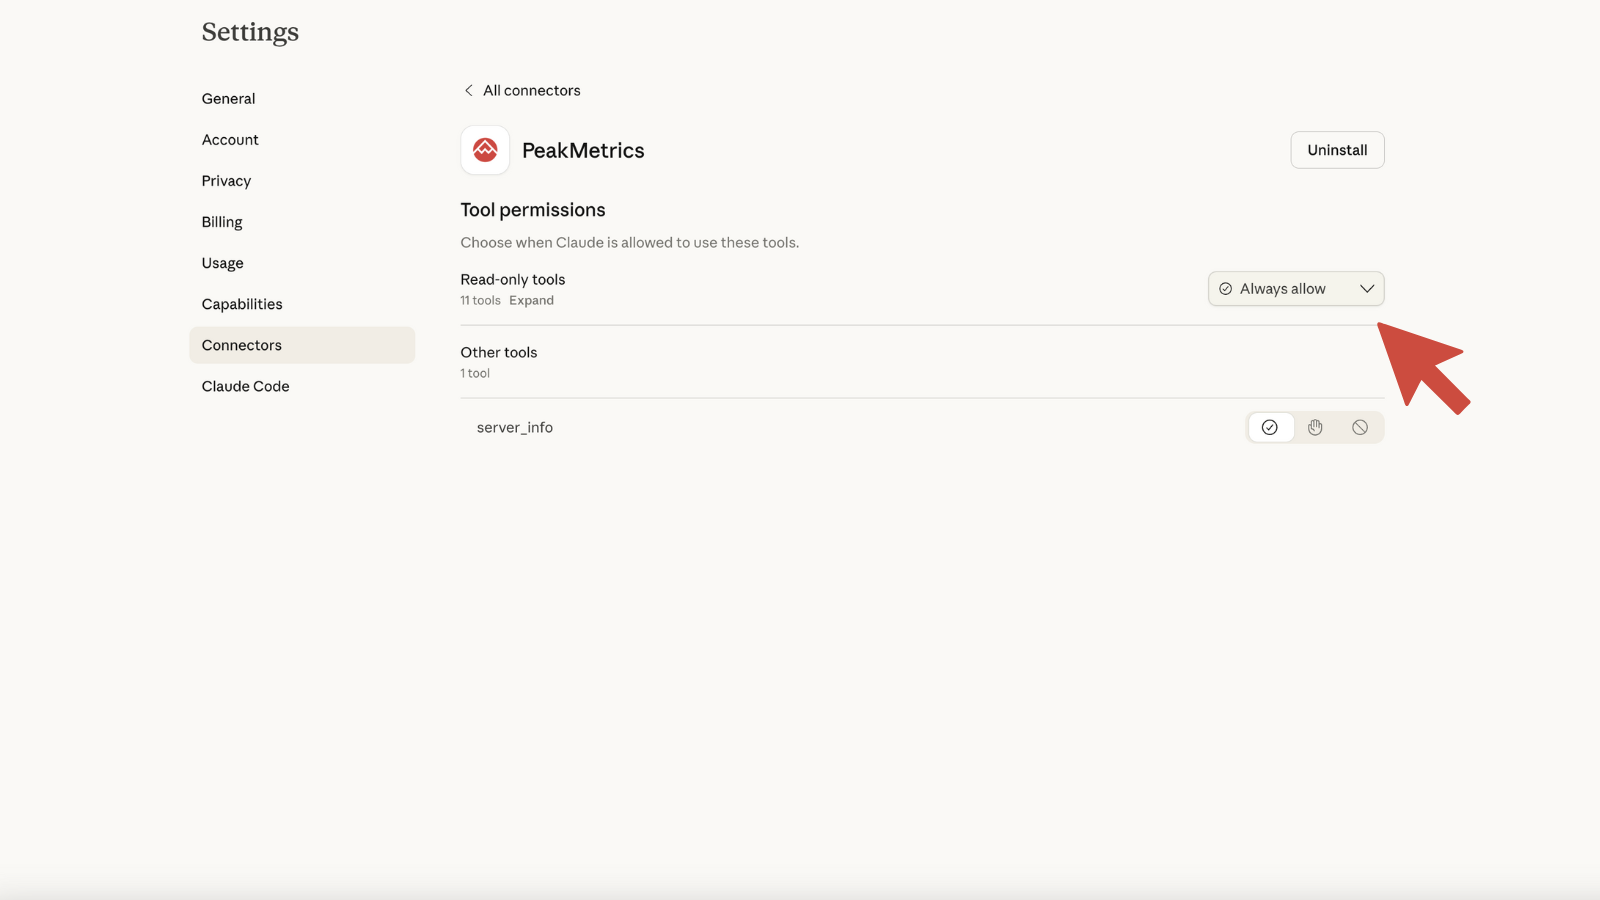
- Ensure your tool permissions for PeakMetrics are set to “always allow”
- Tip: If you want to avoid approving PeakMetrics each time Claude uses it, open Configure and set Read-only tools to Always allow.
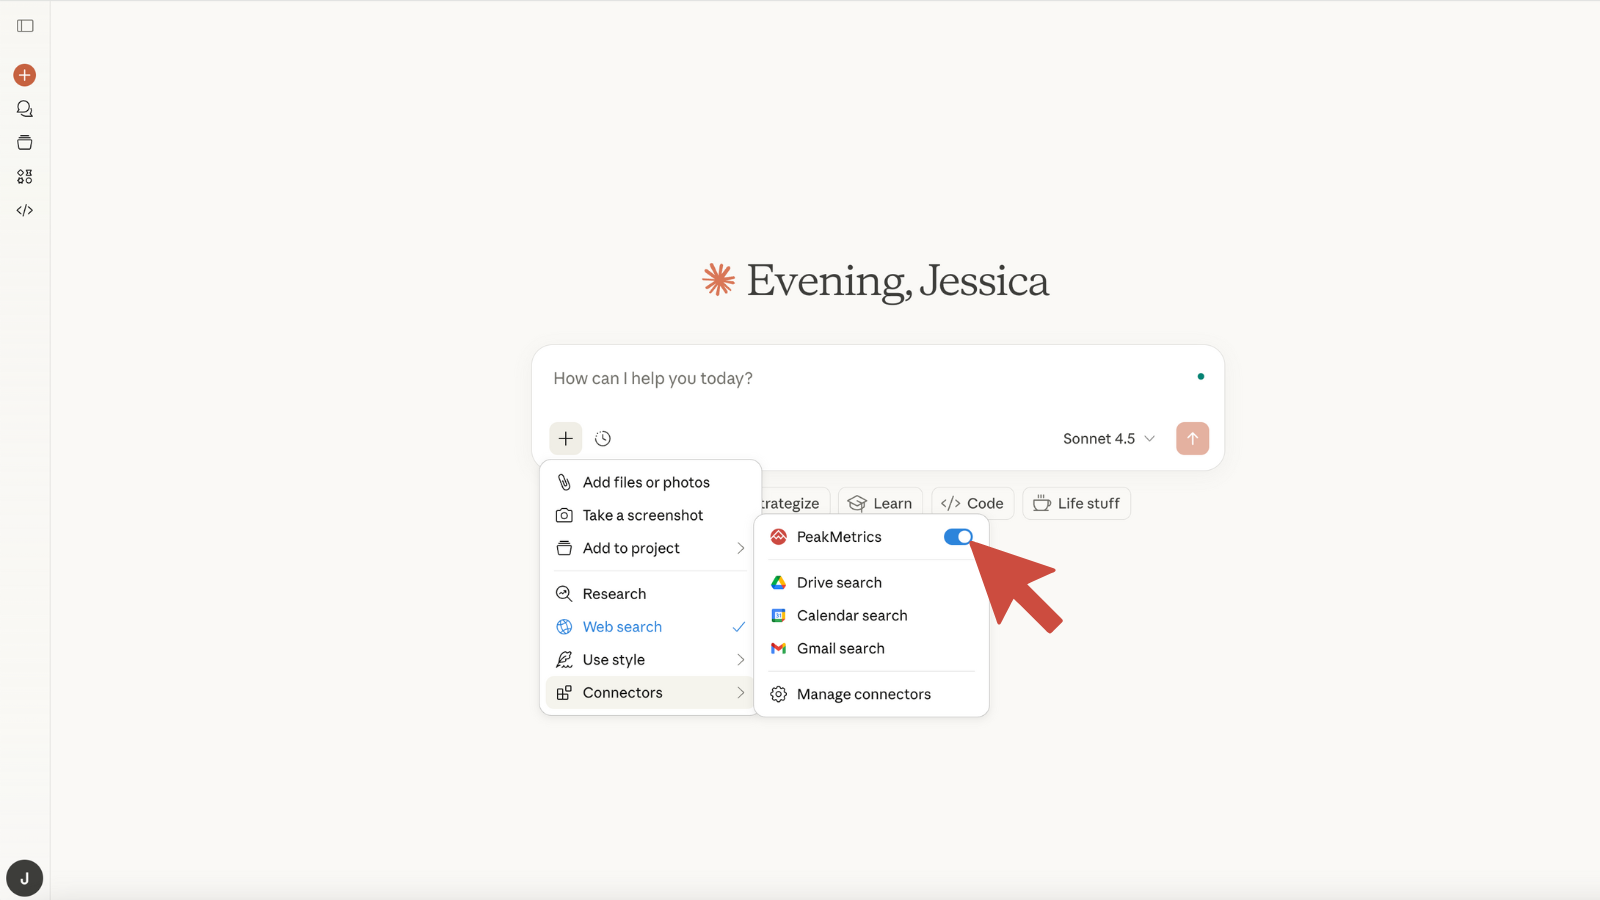
- Once connected, PeakMetrics is available in any Claude chat.
Step 4: MCP Server Updates (Handled Automatically)
Claude automatically handles updates to remotely connected MCP servers.
That means:
- No manual refresh required
- You always get the latest PeakMetrics MCP version
- New tools appear as soon as they’re released
Final Thoughts
Connecting an MCP server to Claude is one of the fastest ways to move from static conversations to live, tool-powered workflows.
Once PeakMetrics is connected, Claude becomes a secure, conversational gateway to your media intelligence data—and the same setup applies to any MCP-compatible service.
Sign up for our newsletter
Get the latest updates and publishings from the PeakMetrics investigations team.